Record Groups: A Complete Guide
Record Group is your central workspace for monitoring everything your AI Agents do - from handling data and generating results to managing calls, emails, documents, and photos. This guide walks you step-by-step through how to add data, open and work with Record Cases, use each menu inside a case, collaborate with your team, and understand how Records helps you oversee operations while the agent does the work for you.
Written By Mahir Mushtaq
Last updated 5 months ago
1. What are Record Groups?
Record Groups are your central space for keeping track of everything your AI Agents do for you in the background.
In Record Groups, you can:
Monitor AI agent activity running in the background
See results generated by agents
View and manage calls, emails, documents, and photos
Work with data stored in database-style tables
Share data and progress with your team
Each Record Group contains multiple Records.
A Record represents all activity and information related to a specific person, claim, customer, crew member, or scenario.

2. How to add data to Record Groups
You can bring data into Record Groups in two main ways.
Option 1 – Upload a database file to an AI Agent
Choose an AI Agent.
Upload your database file to that agent.
Ask the agent to create a Record Group with the columns (categories) you need, such as:
Name
ID
Phone
Email
Claim ID
Any other fields you require
Once the Records list is created, you can:
Work with the data directly using the AI Agent
Create and open individual Records
Update or expand the structure as your needs change
Below is a short video tutorial:
Option 2 – Import a CSV file.
Import a CSV file containing a list of rows and convert each of its rows into a sepeate record system.
Option 3 – Set up automatic data imports
If you want data to flow into Record Groups continuously from other systems:
Contact 913.ai.
Request automatic data imports into Record Groups.
The team will help connect your external sources so data is synced and updated seamlessly in the background.
3. Working with records list inside a Record Group
Once your data is in a Record Group, you will have a list of records, you can manage records individually or perform actions across many records at once.
Working with AI Agents inside a Record Group
While inside a Record Group, you can open the AI Agent and ask it to perform actions across all records in the group.
For example, you can ask the agent to:
Call or email everyone in the Record Group
Start processing all claims in the group
Review, analyze, or update data across multiple records
Run the same workflow for every record
This allows you to operate at scale instead of working record by record.
Below is a short video tutorial:
Managing columns and data
You can customize how records are structured and displayed.
You can:
Ask the AI Agent to add new columns to the Record Group
Provide the data you want to populate the rows with
Use the Columns menu to:
Hide or unhide columns
Rearrange columns in the order you want
Filtering and opening records
You can:
Filter records based on time
Click any record to open it and view the AI Agent’s activity and details for that specific record
4. What is a Record?
A Record contains everything related to AI Agent activity and information for one specific case.
A Record includes:
Every step the AI Agent has taken
All results the agent has generated
All related documents and photos
All related emails and calls
All record-specific details
Opening a Record gives you a complete view of what has happened and what is currently in progress.
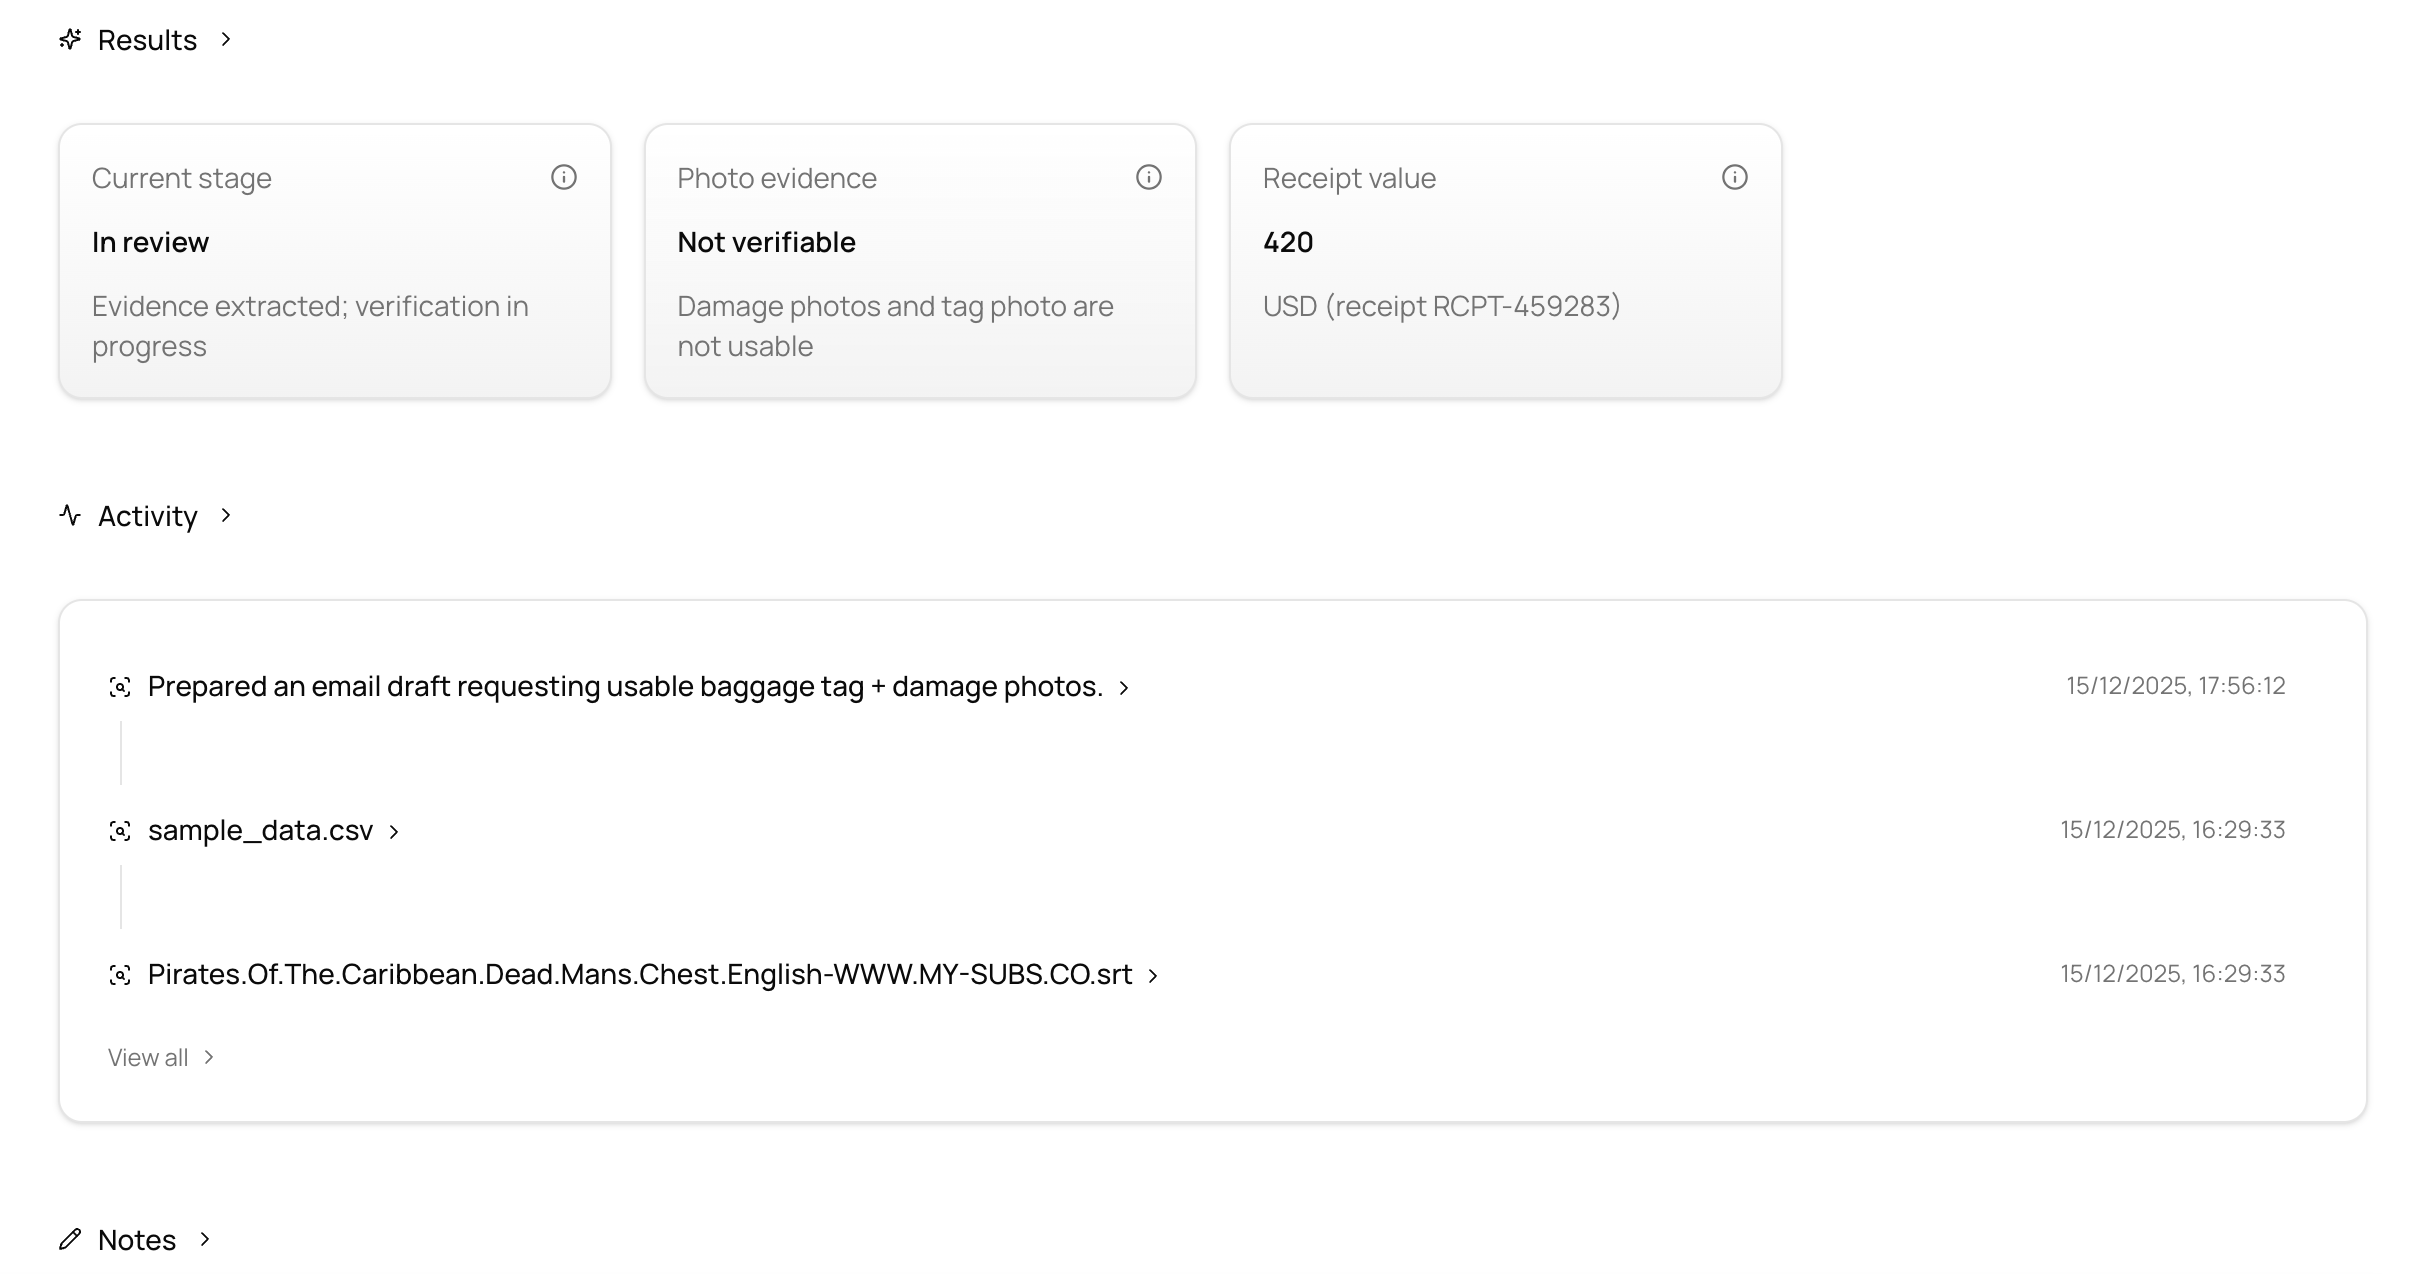
5. Using the Overview menu
The Overview menu is the first screen you see inside a Record.
It provides a quick snapshot of:
Key record details
Important agent results
Latest notes
Think of Overview as a summary of what is happening in the record at a glance.
6. Using the Agent Activity menu
The Agent Activity menu shows every step taken by the AI Agent for the record.
You can:
View a timeline of agent actions
Understand what happened and when
Click any step to see full details
How to use it
View steps
Scroll through the activity list to see everything the agent has done.
See step details
Click any step to open detailed information.
Talk to the AI Agent about a step
Use the agent sidebar to ask questions such as:
“Why did you do this?”
“What does this result mean?”
“Can you repeat this step for other records?”
Add your own activity
Click Add Activity to log actions you performed manually, such as:
A phone call you made
A manual update
An external decision
This keeps the record complete and up to date.
Below is a short video tutorial:
7. Using the Results menu
The Results menu shows all outputs generated by the AI Agent.
You can:
Review agent findings and outcomes
Check calculations, summaries, or decisions
Ask questions about any result
Add or update results manually
Download results for sharing or reporting
Below is a short video tutorial:
Using the Notes menu
The Notes menu contains all notes related to a record, created either by the AI Agent or by users.
Notes are used to capture observations, decisions, reminders, or any important context that should stay attached to the record.
What you can do in the Notes menu
You can:
View all notes added to the record
See which notes were created by the AI Agent and which were added by users
Discuss notes with the AI Agent
Managing notes
You can also:
Add new notes to record important information
Edit existing notes to keep them up to date
Delete notes that are no longer relevant
This makes the Notes menu a flexible space for tracking ongoing thoughts, clarifications, and updates that don’t belong in structured fields but are still important for the record.
Below is a short video tutorial:
8. Using the Documents menu
The Documents menu shows all files related to the record, including:
Documents generated by the AI Agent
Files uploaded by you or your team
Supporting PDFs, Word files, or attachments
You can:
Browse all related documents
Discuss any document with the AI Agent
Upload new documents to the record

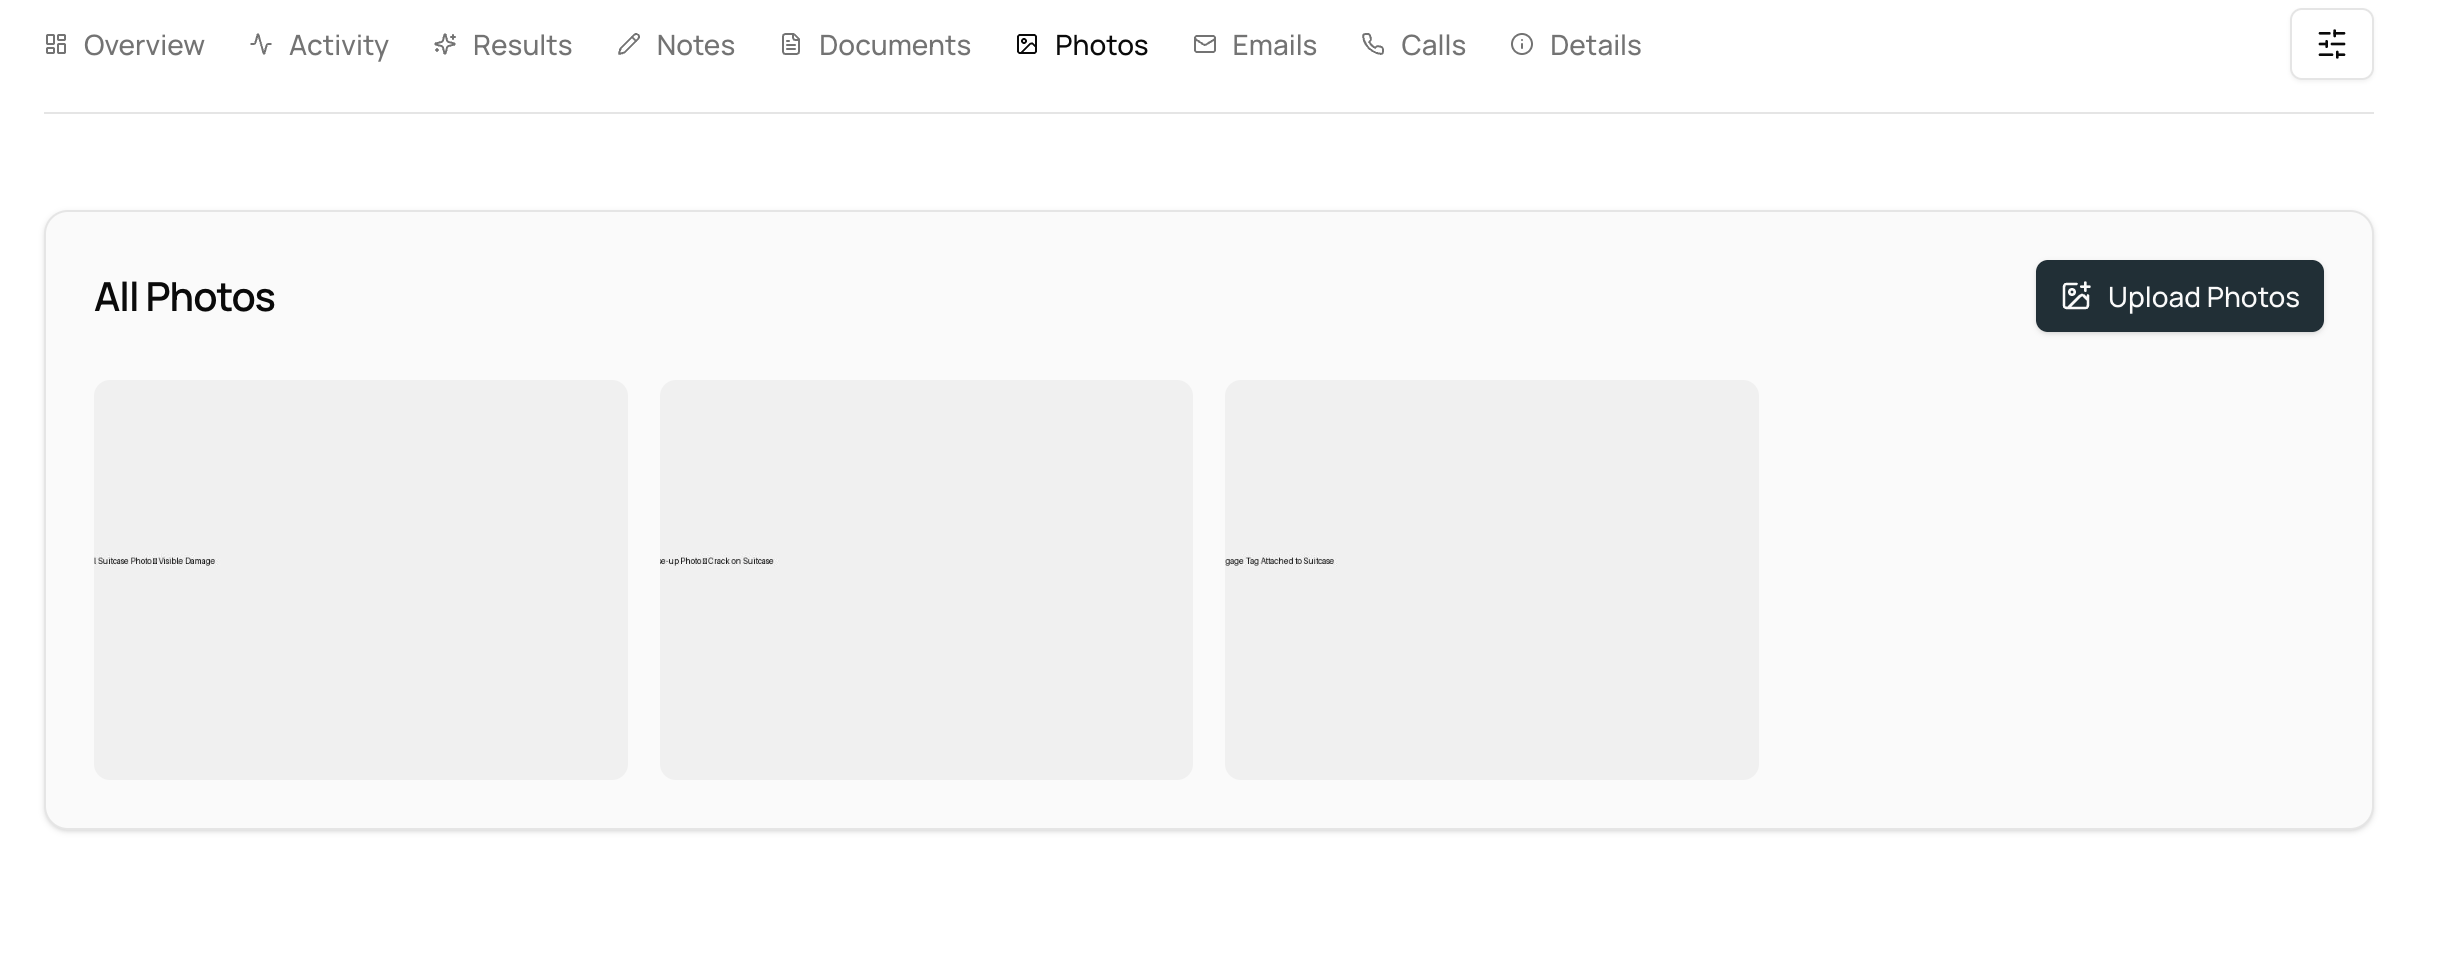
9. Using the Photos menu
The Photos menu shows all images linked to the record.
This includes:
Photos uploaded by you or your team
Photos generated or processed by the AI Agent
You can:
View all photos
Ask the agent questions about an image
Upload additional photos
10. Using the Emails menu
The Emails menu shows all emails connected to the record, including:
Emails sent by the AI Agent
Emails received from external parties
You can:
Review all emails
Ask the agent to summarize, reply, or extract details
Ask the agent to draft and send new emails.
11. Using the Calls menu
The Calls menu shows all calls related to the record.
You can:
View call history
Review call outcomes and notes
Ask the agent to explain what happened on a call
Initiate a new call manually
12. Using the Details menu
The Details menu shows all information related to a specific record.
What you can do
You can:
View all details stored for the record
Discuss any detail with the AI Agent
Ask the agent to use specific details to perform actions
Customizing record details
You can fully customize the information shown by:
Adding new sections
Adding fields to sections
Renaming section titles
Renaming field titles and values
Deleting sections or individual fields
This gives you full control over how record information is structured and displayed.
Below is a short video tutorial:
13. Sharing a Record Group with your team
You can share Record Groups to collaborate with others:
You can:
Share a Record Group with your entire team or selected individuals
Control who has access
View current access at any time
Remove access whenever needed
This enables collaboration without losing control over your data.
Below is a short video tutorial:
14. Quick recap
Record Groups are your central hub for AI Agent activity and data
Records store everything related to one specific person, claim, or scenario
You can add data by:
Uploading a database file to an AI Agent
Setting up automatic imports with 913.ai
Inside each Record, you can explore:
Overview
Agent Activity
Results
Documents
Photos
Emails
Calls
Details
You can perform actions across multiple records using AI Agents
You can collaborate by sharing Record Groups with your team
Records is currently in Beta.
Some features may not yet be available or may work differently than described. We are continuously improving the Records experience to build a new, AI-powered approach to customer and crew relationship management, one where you simply oversee and guide, while the agent handles all the work for you in the background.